Broker configuration
In this chapter, you'll learn how to configure at least one broker on the platform.
Supported Brokers
| Name | Balance | Transactions | Other |
|---|---|---|---|
| Binance | Beta | Beta | |
| Bitcoin Suisse | Yes | Yes | |
| Coinbase | Yes | Beta | |
| Fireblocks | Yes | Beta | |
| Kraken | Yes | Beta | |
| StoneX | Yes | No | Positions |
| Zappier | Yes | No |
Requirements
- You must have an account with at least one of the supported brokers listed above.
- You need to generate an API key for the selected broker (or request one from their support team).
This process is not yet documented — please contact us if you need help.
⚠️ IMPORTANT: Always request a read-only API key. AIPMS only reads data and does not perform any write operations at this stage.
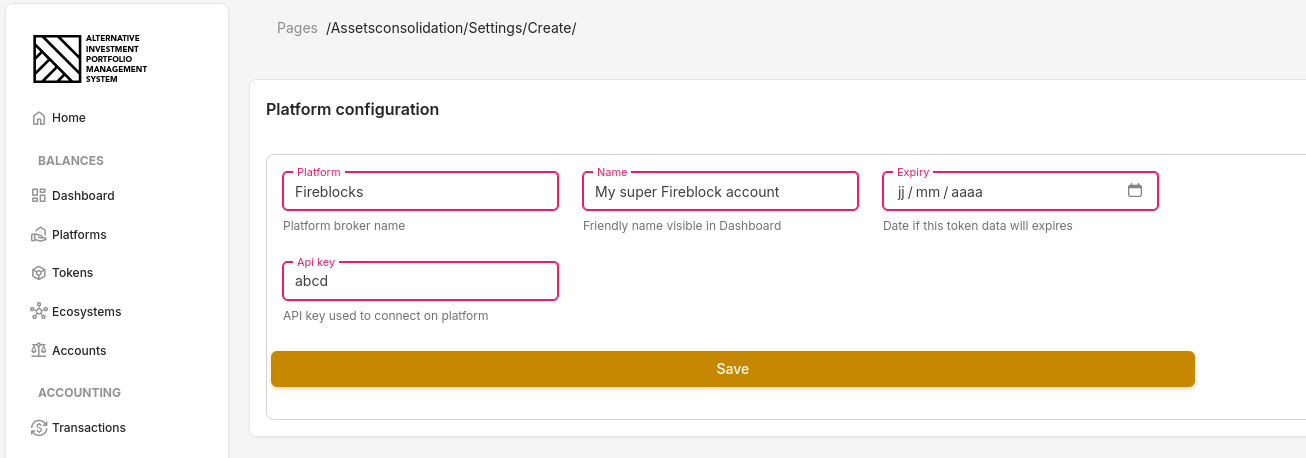
Define the Broker
- In AIPMS, go to Settings > Platform Brokers.
- Click the + Add a new platform button at the top right of the page.
- In the form, select the desired Platform.
- The form will automatically update to show the required information for that broker.
- If the API key has a limited lifespan, set an expiration date to receive a notification before it expires.
- Choose a Name that will be displayed across various sections of the platform.
- Click Save.
ℹ️ Note: You can add the same broker multiple times using different API keys. In that case, choose a unique and friendly name for each to help identify them easily within the app.
Now that you have added at least one broker, click the Refresh now button at the top right of the page.
Allow a few minutes to several dozen minutes for the refresh to complete.
The first import may take some time, as it might create tokens in the database. Balances may be partially displayed in the meantime — this is expected. If you suspect a problem, please wait at least 24 hours before contacting support.